


Easy Timbersled ARO Maintenance Tips
It's no argument that the Timbersled ARO is the toughest and most durable snow bike kit on the planet, but what should you do to keep it running at peak operating condition? Follow along as Brett hits all the major maintenance points on his ARO and explains how, when, and why certain maintenance jobs should be performed.
Video Highlights
|
Topic(s): |
Timbersled ARO maintenance, pre-ride inspection, post-ride inspection, simple maintenance tips, keeping Timbersled ARO in peak operating condition |
|
Narrator/Persons featured: |
Former Timbersled Product Pro, Brett Blaser |
|
Location(s): |
Timbersled Garage in Sandpoint, Idaho |
|
Product(s) featured: |
KTM dirt bike, Timbersled Handlebar Gauntlets, Timbersled ARO, FOX Shocks |
Video Transcription
Brett Blaser: “Lets talk about Timbersled maintenance from a dirt biking perspective. I think the thing I like least about summer dirt bike maintenance is washing the dirt and grime off my bike. And the opposite is what I like most about Timbersled maintenance. Not washing it and having a perfectly clean kit and bike to look over. I'm going to assume you've got your Timbersled kit installed on your bike and you want to learn some of our insights into keeping your Timbersled ARO in peak operating condition.
ARO is the tougheset and most reliable snow bike kit on the planet, and you can keep it that way by reading and following the information in the owners manual. Yes, it does have some great information. I'm going to cover some of the maintenance info from the owners manual and provide some additional tips but the owners manual will go into more depth and has critical information such as the proper torque specs that you should all be using and maintenance tables that you should follow.
Let's start at the front and work to the back. This is what I check before each ride and not the night before I ride. It's best to inspect your bike and your Timbersled as soon as it's melted dry from your last ride. That way, if you need anything you have time to get it from your dealer and not miss a ride. Now the post-ride inspection, it takes me maybe a quick 5 or 10 minutes and then I can ride with confidence.
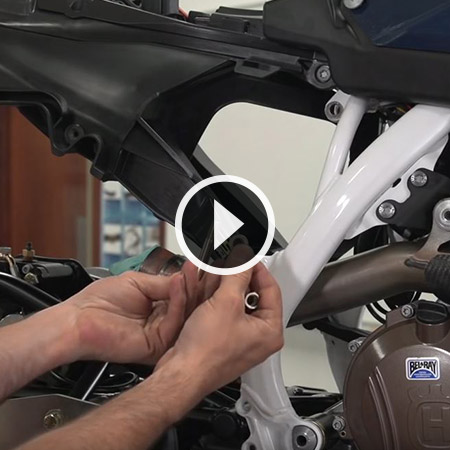
First, I've secured the bike and I have it on an engine stand. I'm focused on 3 main things: I'm going to inspect, retorque, and lube. Now, first I'm going to look over the front ski, the ski skags, the spindle, and the fork clamps. I'm looking for visual damage or anything out of the ordinary.
Then I'm going to retorque what are, in my opinion, the two most important torque specs on the entire kit, the fork clamps and the skibolt. Don't tell me how calibrated your wrench hand is. Just trust me and use a torque wrench on all of these bolts. Now the torque specs are where? In the owner's manual, super important.
Now I'm going to check the brake and follow the brake line visually all the way back to the caliper to make sure the line is away from pinch points and heat sources. I'm also gonna look at the brake pads to see if they appear warm or if they're still good. If I'm at 150 mile, a 500 mile or 1000 mile service interval, I'll retorque all of the connection points like the upper shock bolt, the swing arm bolt, etc.
Now I'm at the rear end and there are two chains to check: the primary chain and the chain case chain. After my first ride, I'll pull the chain case cover and inspect, retighten, and move the chain. I pull the cover off so that I can get a feel for the proper chain tension so I don't have to take the chaincase cover off each time.
Here's how I do it: with the bike in neutral and the cover off, I can rotate the jackshaft sprocket and note how far it moves. It will move farther if the chain is loose and be nearly solid if the chain tension is correct. Next time I check it, like when I'm riding, I can simply grab and rotate the jackshaft sprocket and instantly know if I'm loose or tight in the chain case, and with the arrow it's super easy to adjust the chain. I simply loosen the tensioner bolt which is here, apply the proper downforce to get the 1/2 to 5/8 inch tension that I want, retighten and rotate the sprocket to verify. Done. I can move the chain and reinstall the cover.
ARO is designed so you can check the chaincase chain tension and lube the chain without taking the cover off. I checked the tension as I've mentioned and then with the track off the ground and the bike secure, I can let the bike idle in gear while I lube the chain through the lube port on the back of the Chaincase cover. That's why that hole is there. It's super quick and easy. Just note the angle of your nozzle, so you get the whole chain lubed. Did you know there's also a moisture drain port in the bottom of the chaincase cover? Yep.
The primary chain is also quick and easy. It's right here. I'm gonna roll in an unmounted kit so you can see the parts of this better. First, loosen the 215 millimeter frame bolts right here. And then the 13 millimeter jam nut and the 10 millimeter adjuster bolt to get proper tension, then tighten the jam nut and retorque the two frame bolts. Win done. It's simple. Proper chain tension is 1/2 to 5/8 free play with a fixed strut and TSS kits when the rear is off the ground. Now off the ground. Otherwise you'll over tighten your chain. Note that the chain will loosen as the TSS compresses. This is normal and the opposite of a dirt bike which tightens as the suspension compresses. Make sure to have it off the ground floor.
Here's a great tip: if you've ever over tightened the chain on your dirt bike, you probably already know this, so let's assume that you've overtightened the chain on your ARO and, you know, you wanna loosen it. There are two easy ways to do it, and one is in the owner's manual. So read it. Another way is to simply loosen the two frame bolts and the jam nut and chain adjuster bolt, then with the bike on the ground and in first gear, let the clutch out just slightly and the engine will pull the frame shorter and the chain loose for you.
Next, I'm going to look over the rear of the kit, the side panels, the frame and the tunnel top. I'm looking for anything damaged. Remember the entire inspection part of this process is quick, about 5 or 10 minutes. Now that we're back to the suspension and track, if I don't see anything odd, I'm only going to focus on really two things: Hyfax wear and track tension.The hyfax is this long strip that the track clips run on. Snow lubricates and cools the hyfax, so if you ride in frozen or low snow conditions, the friction can cause them to heat up and cause wear. Now, there's a wear line on each hyfax, so you can tell if they're good or if they’re worn. There's also a pre-drilled hole right here where we've installed these ice scratchers. The ice scratchers are designed specifically for the ARO kits. You can get them at timbersled.com or your local Timbersled dealer, and you want to use these if you run on frozen or hard packed snow.
Now let's look at the track and don't tell your buddies this, but there is definitely some performance to be gained with proper track tension. Now each track is slightly unique and they break in differently over time. So what I want to check is I want to make sure the track is running straight and that it's properly tensioned. So with the rear of the bike elevated and supported, I'll let the bike idle in 2nd for several revolutions and then shut it off and inspect so I can make sure the track is running straight. It's easy to see where the clips are running on the hyfax. If I need to adjust it left or right, I loosen the axle bolt and adjust the tension bolts on each side. If the track was too far to the left, for example, I'll tighten the left bolt a partial turn at a time and repeat the process until I have it running true.
Track tension for the owner's manual should have 1/2 to 3/4 of an inch of free hang or gap at the center in the track. You'll only ever tighten it if it skips the driver’s under acceleration. Now some tracks, they'll stay tight after break in and I found additional performance by loosening my track a bit more, but not to the point that it ratchets or skips on the drivers.
So let's recap. Make sure to read the owner's manual and stick to the recommended service intervals and torque specs. It tells you what to check and when. Proper torque for the front fork clamps and the ski bolt are most important and always use a torque wrench, especially at those locations. Always tighten your chain with the track off the ground and after each ride always do a quick inspection and lube your chains. Now that you know how quick and easy it is to keep your ARO in top condition, grab that owner's manual and give it a read. Haven’t I mentioned that a few times already? I have. Now, go ride with confidence knowing you're on the toughest and most durable kit on the planet.”
Maintenance Resources


Share this story