


How to Install ARO & RIOT Snow Bike Systems on a Dirt Bike
Join Brett Blaser as he takes us through the installation process step by step for a Timbersled ARO snow bike conversion system. This installation walkthrough is also applicable to RIOT models.
Ready to install your own system? Check out these handy links below to find what you need to convert your bike from dirt to snow and get out on the powder.
Video Highlights
|
Topic(s): |
Timbersled ARO & RIOT installation |
|
Narrator/Persons featured: |
Former Timbersled Product Pro, Brett Blaser |
|
Location(s): |
Timbersled Garage in Sandpoint, Idaho |
|
Product(s) featured: |
Timbersled ARO & RIOT systems, KTM dirt bike |
Video Transcription
Brett Blaser: “Hi, I’m Brett with Timbersled. Today we’re going to install the new ARO chassis on a KTM. Note that ARO fits a wide variety of dirt bikes and you’ll need an install kit specific to ARO to make this install happen. The Mountain Horse or older generations of Timbersled use a different or Mountain Horse install kit. Let’s get started.
Make sure to go to Timbersled.com and download a copy of the installation instructions if you don’t have a set or get a set from your local Timbersled dealer.
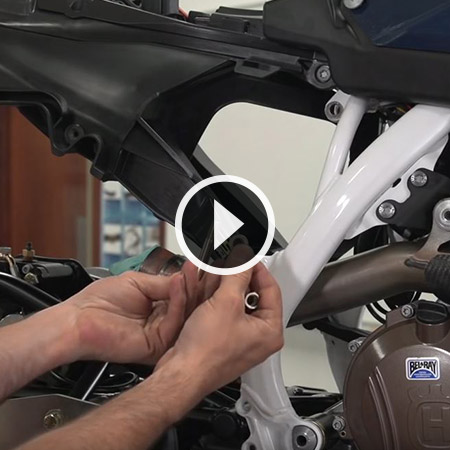
We’re going to begin by disassembling the rear end of the motorcycle. Very simple. Note that I’ve already taken the chain and disconnected the brake line from the motorcycle. We’re going to start by taking out the swingarm pivot bolt, the linkage bolt, the upper shock bolt, and then we’re going to slide out the swing arm, the tire, and the shock as one complete assembly so we can put it on easy next year.
Now we’ve opened our install kit and we’ve got all of our sub frame reducers. Each sub frame reducer is going to take an O-ring and a light coating of grease. This should install nice and easy. If you’re not sure what location these reducers go in, make sure to go to Timbersled.com, print out the ARO fitment table, find the motorcycle thar you’re using, and you can tell which sub frame reducers go in which location.
One important thing to note is that for 2018, the pivot forging bushings are already pre-installed in the front of the Timbersled chassis, makes installation even easier.
Now that we have the sub frame reducers installed in the front of the pivot forging, we’re going to install the main chassis into the motorcycle using the main swingarm pivot bolt.
Now we’re going install the Timbersled suspension strut. You may also be using a Timbersled fixed strut install kit, either one works great. Refer to the fitment table so that you can understand which spacers go where, in this case it’s the yellow spacers that go in the top.
Now we’re going to install the two bolts in the bottom of the trunnion ball mount. You may have to raise or lower your stand to get them in the proper position.
Next, we’re going to uncoil the brake and we’re going to run it up the frame and mount it on the handlebar, keeping it clear from all heat sources and watching out for any sharp objects or pinch points. Let’s make sure the brake line is routed clear of the exhaust pipe.
Now that we’ve run the Timbersled brake line up the chassis and secured the line away from any pinch or heat points, we’re going to remove the stock master cylinder and replace it with the Timbersled master.
Now to install the main chain, we’re going to loosen the frame rail pinch bolts. Now we’re going to loosen the chain tension adjustment bolt. Now let’s put the chain on. I like to put the chain on the sprocket and rotate it up so that it holds the chain in place while I install the master. Make sure and put the clip going in this direction so that it can’t come off once installed. I’m going to tighten these two to finish the chain installation process.
Reinstall any of the final components from your dirt bike and let’s move onto the front end.
The front end is also quick and easy. We’re going to remove the front brake, the front fork guards, and the front wheel. Now we’re ready to install the Timbersled ARO front end.
Note that for this next step, I’ve referenced the fitment table, pulled out all of the installation components that I need from the install kit box including the front spindle reducers, and I’ve already installed the spindle onto ski. I’m going to slide it into position, install the reducers into the spindle, put the axle in position and then put the four clamps on. Make sure to orient the slot towards the back. I also want to make sure that both fork clamps are seated on the fork lowers and that they’re parallel straight across from each other. Make sure that the longer bolt is in the back. The spindle is slotted so I want to make sure when I put this outer fork clamp on that I locate slots and it can only be installed in the correct position. If your bolts go through, you’re in the correct position. Make sure a washer goes on the inside. Now we’re going to tension the pinch bolts and the front axle. Then we’ll reinstall the front fork guards. Note that I’ve already trimmed out the fork guards so I can use it. You may choose to do this or run it without fork guards.
That’s how quick and easy it is to install the Timbersled ARO on your dirt bike. Make sure that as you’re going through the installation process that you refer back to the installation instructions, so you don’t miss any steps. Also make sure to properly torque all the bolts, including the front ski to spindle bolt. Make sure and keep that tight, check it all the time, even when you’re riding.
Thanks for joining us.”


Partager ce récit