


TRIO Front Shock Setup and Tuning Tutorial
Que vous parcouriez des champs, descendiez des sentiers tortueux ou des escarpements, les ingénieurs de Timbersled ont développé TRIO™ pour tous les motoneigistes. Découvrez comment configurer TRIO pour la première fois sur votre moto et comment l’adapter à votre poids et style de conduite.
Video Highlights
|
Topic(s): |
Tutorials, shock setup and tuning, snow bike accessories |
|
Narrator/Persons featured: |
Former Timbersled Product Pro, Brett Blaser |
|
Location(s): |
Timbersled Garage in Sandpoint, Idaho |
|
Product(s) featured: |
Timbersled TRIO Front Shock, Honda dirt bike, Kawasaki dirt bike, KTM dirt bike, Yamaha dirt bike, Husqvarna dirt bike, Timbersled ARO |
Video Transcription
Brett Blaser: “If you're a dirt biker, you've probably experienced good suspension and bad suspension. Have you ever ridden a soft enduro bike on a motocross track or a stiff motocross bike in the woods? It takes a vastly different suspension setup to make your bike work well on the track or in the woods, and it isn't possible to set up your forks to work right for both of these scenarios, and we're talking about riding on dirt which ranges from hard pack to mud or sand, not snow. Snow is infinitely more variable, ranging from solid ice to four feet of powder. And with snow bikes, we're not just dealing with snow. We ride in all terrains from flat trails to steep side hills, to big tall drops and ravines. We need more than just a stiff set of forks that lose their plushness.
Now, what if you could have the perfect suspension setup that bolted on in minutes, preserves your exact summer set up for a quick changeover, and it worked everywhere. It was plush on the frozen trail chatter, firm and bottomless off big drops, and it did everything just right. That's TRIO, and it does even more. See our other TRIO videos to learn more of its benefits.
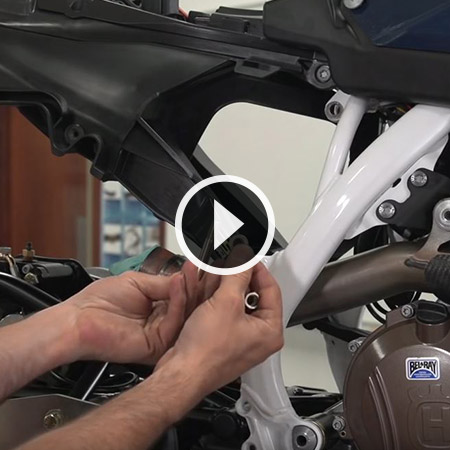
Let's talk about how to set up TRIO for the first time and then how to really tune it into your weight and riding style. Now, see our TRIO install video if you have installation questions. Once you have TRIO bolted up on your bike, it's time to set your initial pressures in both chambers. Now, with the bike on a stand so there's no weight on the front, set the pressures in the order that it shows on the sticker.
First, set the EVOL chamber. This is the lower valve to 30 PSI. Then, set the main chamber. This is the upper valve to 20 PSI. Always adjust the EVOL chamber first. Now go ride. This setting will work well for the majority of riders, the majority of the time. You really can just set it and ride. See the TRIO owners manual for maintenance and service intervals. Let's dig deeper.
TRIO has our specific Timbersled snow bike tuning inside, our secret high and low speed compression recipe, which is incredibly speed sensitive and our tuned rebound valving. It's pro level suspension for all of us and it’s set specifically for your Timbersled kit.
Now, TRIO has two chambers that are adjustable. The main chamber and the EVOL or extra volume or bottom out chamber. Now, keeping it general, the main chamber, this sets your spring rate and affects your preload, so more air equals more spring rate. Now, although it's much more complex than this, adding air to the main chamber is kind of similar to going with stiffer springs on your forks, only much more beneficial with TRIO.
The smaller EVOL chamber sets the progressiveness of the suspension. The higher the EVOL pressure means the air in your main chamber gets stiffer quicker. Less EVOL pressure, and your front end gets stiffer, slower. Increasing air pressure in the EVOL chamber gives a more progressive spring curve. So it starts soft, but it ramps stiffer more quickly. This protects against harsh bottom outs. Now, the EVOL pressure controls the bottom out characteristics of the TRIO.
So, let's translate this into actual riding. Now, zooming back out let's think of the EVOL chamber as our bottom out chamber and the main chamber as our spring rate. If I want a nice plush ride up the frozen whoops on the trail in the morning, but I don't want to bottle my forks out once I dive off into the woods and I hit the occasional jump, I could set the main chamber soft and plush at say, 10 PSI, and the EVOL or bottom out chamber stiffer at 50 PSI.This will give a super plush ride, keep me high in the stroke through those downhill ravines and it won't let it bottom out if I really get after it.
Now, what if I'm a racer on a tough snowcross track and I want to use the entire suspension stroke, every drop of it? I'll definitely want to focus more on the main chamber and less on the EVOL. I'll add pressure to the main chamber and pressurize up to, say, 30 or 35 PSI and I'm going to lower the pressure in my EVOL chamber so that it ramps right at the end of the stroke to prevent bottoming.
Now, when you're adjusting your TRIO, remember to start at the bottom and work up, always adjust the EVOL chamber first and then your main chamber. And your pressures, they're probably going to vary from mine. Now, you can run between 5 and 50 PSI in the main chamber and between 10 and 100 PSI in the EVOL chamber.
So, as you can see, you can set TRIO to the recommended pressures on the sticker or you can quickly tune it even more to match your style, your terrain, or your attitude. Some days you just want to enjoy a nice plush ride and some days you want to rip. Either way, you can ride TRIO knowing you have the best pro level snow bike suspension on the planet and it's quick and easy to swap back to your summer setup.
So, see your local Timbersled dealer or Timbersled.com to get your TRIO today.


Partager ce récit